This post may contain affiliate links. If you make a purchase through these links, we may earn a commission at no additional cost to you.
A holiday kitchen has to do two jobs at once: feed everyone and look warm while doing it.
The best thanksgiving kitchen decor works around the cooking instead of competing with it, sitting in corners, at island ends, and on side counters where it can be moved in a single motion.
Warm materials like wood, ceramic, linen, and dried botanicals carry the seasonal feeling without demanding a full redesign.
The ideas below share one test: does the arrangement survive a day of chopping, roasting, and dishwashing and still read as intentional by dessert?
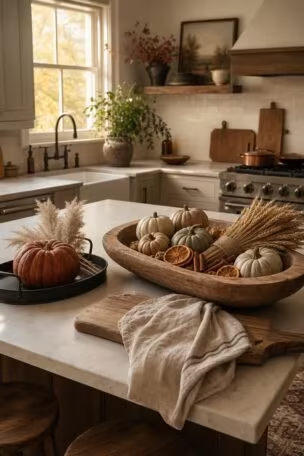
Harvest Bowl Centered at One End of a Wood Kitchen Island
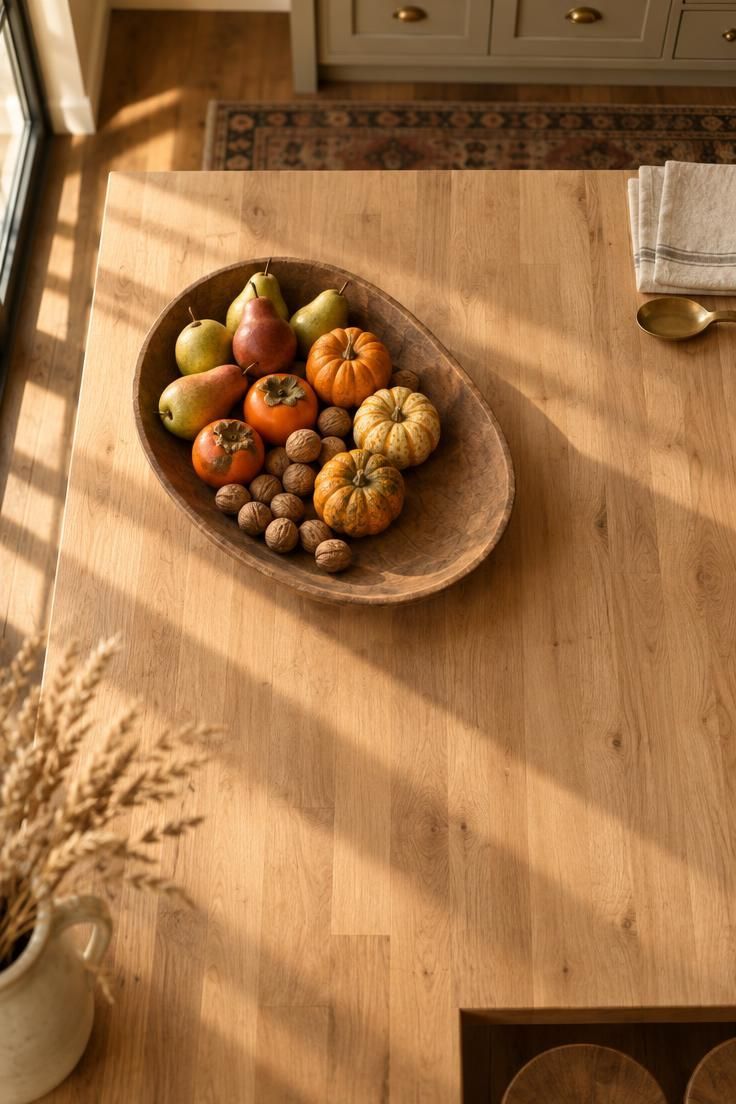
A wide, shallow bowl gives a fall kitchen island centerpiece its shape.
Fruit reads as a low horizontal band rather than a tall obstacle, so sightlines across the room stay open.
Stacking pears against round pumpkins adds two heights, and leaving part of the bowl empty keeps the arrangement from looking packed.
Placement does most of the practical work.
Near one end of the island, the bowl leaves the middle open for dough, roasting pans, and serving platters, and it lifts away in one motion when the surface is needed for carving.
Dead center looks formal but gets in the way by mid-afternoon.
Choose produce that holds for several days without refrigeration: pears, persimmons, small pumpkins, and shelled or unshelled nuts all fit.
Rotate pieces as they soften, and keep decorative gourds separate from anything headed for the oven.
Wood tone matters as much as the contents.
A dark walnut bowl disappears against a dark island, while pale oak or a bleached finish separates cleanly from most countertops.
A footed compote adds lightness underneath but tips more easily when bumped.
Style Blueprint:
- Place the harvest bowl at one end of the island, leaving the center and the opposite end free so the display never blocks dough work, cooling racks, or a quick lunch plate.
- Use a pale, low-sided wood bowl with visible grain so the produce is separated from the island surface; if the island wood is already pale, a lightly oiled darker bowl still reads as a warm brown layer without blending away.
- Arrange two relaxed mounds at one side, with a pear or persimmon leaning against a small pumpkin and a few walnuts tucked into the open gap, then keep a scrap of cream linen and a narrow spoon rest at the far edge to balance the empty wood.
Short Linen Runner Stopping Before the Main Work Zone
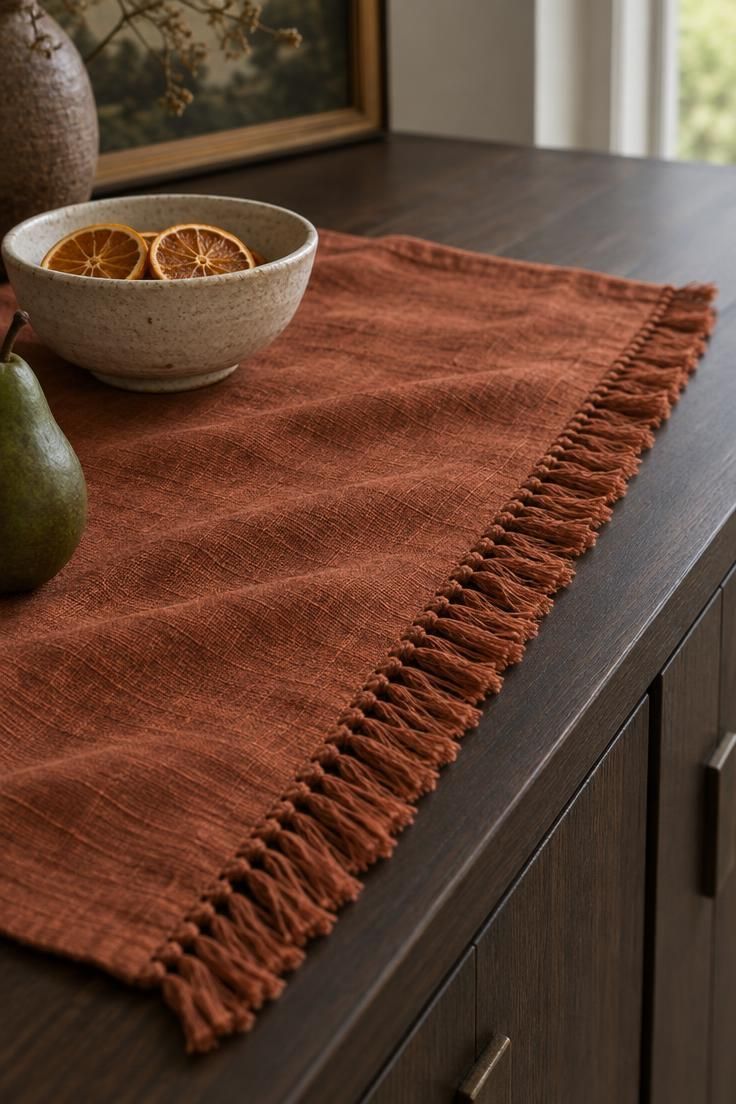
Fabric softens the hard plane of a sideboard or the far end of an island, and a short runner keeps that softness contained.
Visible weave, a fringed edge, or a woven stripe in rust, ochre, or deep green carries the color without a full tablecloth.
The key decision is where the runner stops.
Ending well before the zone where hot pans land or dough is rolled keeps the fabric away from splashes and crumbs, and a short length goes into the wash more easily than a full cloth.
Smooth it flat so it reads as a deliberate layer rather than a dropped towel.
Color contrast does the rest.
A rust runner over dark wood is richer than the same runner on pale oak, where ochre or olive separates better.
Test the length against the surface before committing, since a runner that ends in the middle of a usable stretch invites constant adjusting.
Style Blueprint:
- Use a rust-colored linen runner with a visible slub weave and hand-knotted fringe, stopping it well before the main work zone on a dark wood sideboard or island end.
- Place a small cream stoneware bowl holding a few dried orange slices at one end of the runner, letting the contrasting pale ceramic and warm fruit sit against the dark wood.
- Anchor the composition with a single dark green pear just entering the frame of the vignette, keeping the extra object off the runner so the fabric edge stays visible.
- Rely on soft diffused daylight from a nearby window to wrap the linen without harsh shadows, leaving the runner flat and smooth so the fringed edge reads as deliberate layering.
Mixed Ceramic Pitchers and Crocks Holding Cooking Utensils
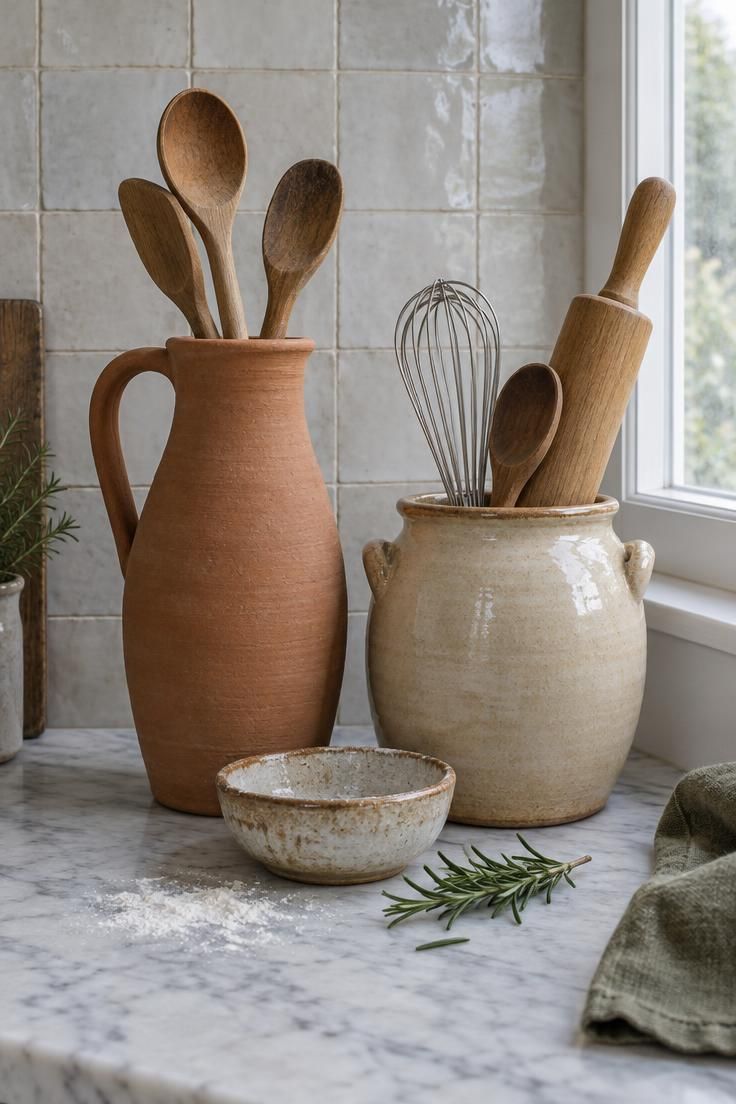
A cluster of ceramic vessels holds tools within reach and doubles as decor.
Varying the heights creates a vertical stop against long runs of backsplash, while mixing matte clay with a glossy glaze keeps the grouping from reading as a matched set.
Position matters more than the pieces themselves.
Placing the group beside the stove keeps spoons and whisks accessible, but the tallest pitcher should not block the view across the cooking area or compete with the stovetop for space.
A crock that is too wide crowds the corner where a cutting board wants to sit.
Rolling pins present a storage question.
Standing one upright in a tall pitcher looks sculptural but can lean and topple, so many kitchens keep the rolling pin horizontal in a drawer and reserve the vessels for lighter tools.
Style Blueprint:
- Leave a little breathing room between each vessel so the matte clay texture, glossy glaze, and pale tile stay distinct instead of blending into one muddled surface.
- Let a few tool handles rest at different heights rather than pushing every utensil to the bottom, which gives the cluster a less staged, more ready-to-use look.
- Use a folded olive cloth at the edge of the counter to repeat the stone and clay tones while catching any drips from a just-used spoon or whisk.
- Choose one vessel with a wider mouth for whisks and spatulas and keep narrower pitchers for spoons, so the bulkier tools do not get stuck or hide the smaller handles.
- Add a single sprig of rosemary or a dry bay leaf near the base of the vessels as a small, replaceable accent that picks up the earthy palette without adding clutter.
Open Shelving Styled with Cream Dishes and Dried Wheat Bundles
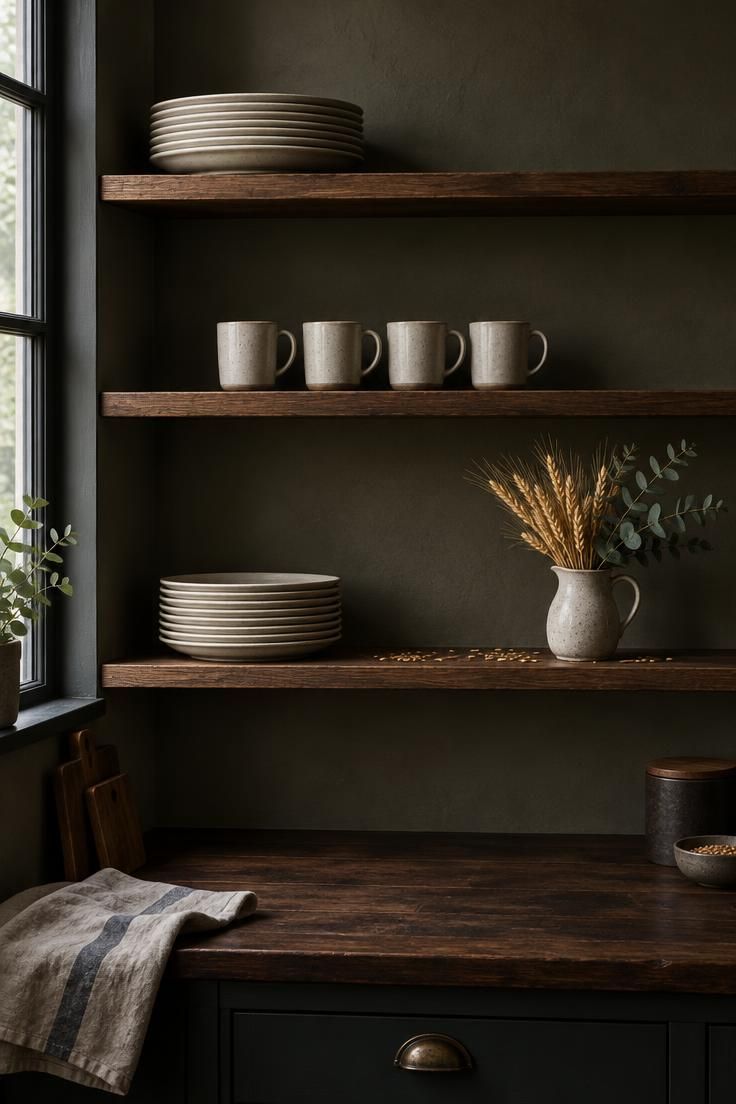
Open shelving turns dishes and dried stems into the wall treatment itself, which helps in kitchens short on counter space.
Restraint is the whole look: repeated plate stacks, one row of mugs, and a single vessel of dried wheat or eucalyptus.
Empty shelf space between groups keeps the composition calm.
Dried botanicals open shelving arrangements look best when they shed as little as possible.
Wheat and eucalyptus drop seeds and leaves over time, so shake bundles outdoors before positioning them and expect to wipe the shelf now and then.
Some households find dried stems dusty, which is a reason to keep bundles small and few.
Grouping repeats shapes rather than mixing them.
Two stacks of the same plates read as intention, while four different dish patterns read as storage overflow.
Keep one or two textural accents per shelf and let the dishes carry the rest.
Style Blueprint:
- Stack cream stoneware plates in two neat piles and place a row of simple mugs nearby, leaving empty shelf space between the groups so the wall shows through.
- Add one stoneware pitcher holding a small bundle of dried wheat and a few eucalyptus stems, shaken outdoors first to reduce shedding.
- Keep the composition restrained with a single textural accent per shelf, letting repeated shapes and generous negative space define the look.
Cocoa Station Tray with Mugs, Cinnamon, and a Small Fruit Bowl
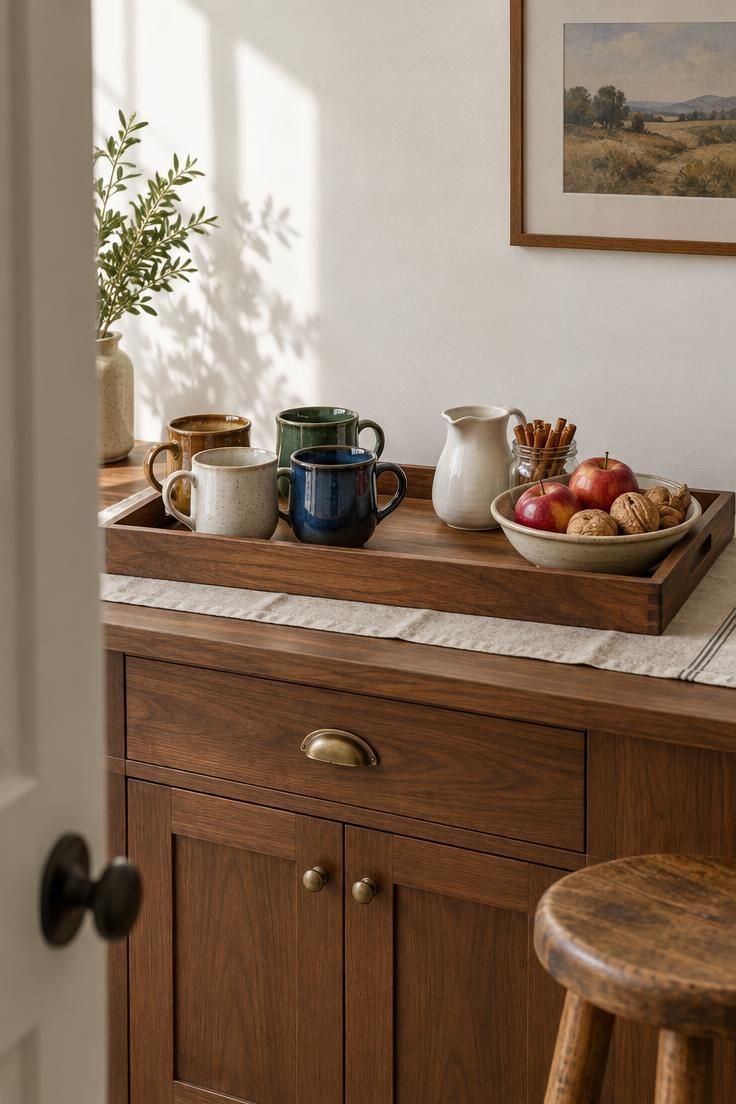
A kitchen cocoa station tray corrals mugs, a pitcher, cinnamon sticks, and a bowl of apples or nuts into one movable unit.
Everything lifts away together when the counter is needed for serving dishes, which makes the idea unusually forgiving on a busy day.
Size discipline keeps the tray from becoming a shelf.
Filling no more than about two thirds of the surface leaves room for a hand to reach in, and a modest tray fits a side counter away from the range and sink.
A tray that spans the whole counter looks generous but cannot be cleared quickly.
Mug choice affects the visual rhythm.
Four mugs in the same glaze read calm, while mixed shapes suit a more collected look.
Either way, keep the tallest items toward the back of the tray so the grouping steps down toward the room.
Style Blueprint:
- Use a rectangular walnut tray with straight or softly rounded edges so the wood tone repeats in the mugs’ reflections and the fruit bowl.
- Place a plain linen cloth under the tray, letting about an inch of fabric show on two sides, to keep the counter from reading as bare without adding pattern.
- Arrange four mugs so their handles point the same direction, keeping the shortest mug in front and the tallest at the back to create a clear front-to-back step.
- Set a shallow white ceramic bowl of red apples and walnuts at one corner, leaving the opposite corner of the tray empty so the arrangement stays easy to lift.
Seasonal Dish Towels Draped Over an Oven Handle and Folded in a Basket
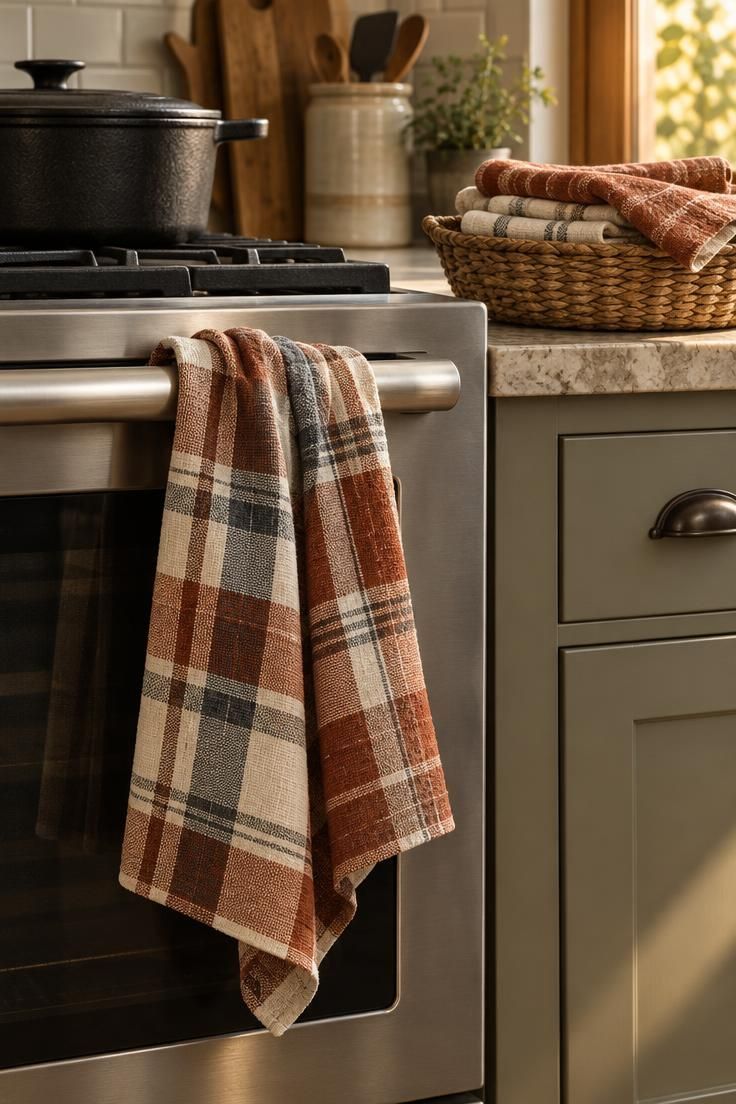
Towels are the least demanding way to bring thanksgiving kitchen decor into a working space.
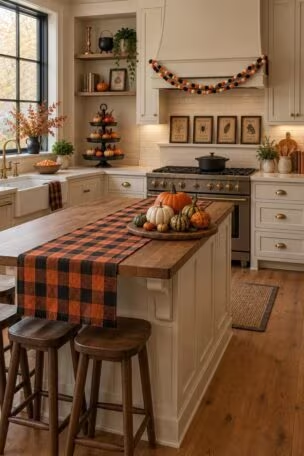
A plaid or deep rust towel over the oven handle reads seasonal in one glance, and a shallow basket of folded towels on the counter keeps spares within reach.
The practical loop matters.
Towels near heat and food prep get soiled quickly, so a small nearby stack lets the visible towel be swapped mid-cooking without hunting through a drawer.
Wash and rotate the display towel rather than letting it sit for the whole season.
Pattern carries the palette.
Plaid in rust and cream sits comfortably beside solid olive and ochre towels, and choosing two patterns plus two solids gives enough variation without visual noise.
A basket that is too deep swallows the folds and hides the color.
Style Blueprint:
- Pick a plaid with rust, cream, and charcoal as the main visible towel, then keep it draped on the oven handle in a single soft fold so the weave stays readable.
- Use a shallow woven basket on the counter next to the oven for folded spare towels, with one towel slightly askew so the stack does not look over-arranged.
- Mix only two patterns and two solids in rust, cream, olive, or ochre, repeating the oven-handle plaid on one folded spare for a lighter repeat.
- Swap the visible oven-handle towel for a clean spare before it becomes heavily soiled, then move the used towel to a hidden laundry spot instead of leaving it out all season.
- Keep the basket close enough to reach from the stovetop but far enough from the cooking surface that towel folds do not block the oven controls or vents.
Round Bread Board as a Base for Candle and Mini Gourds
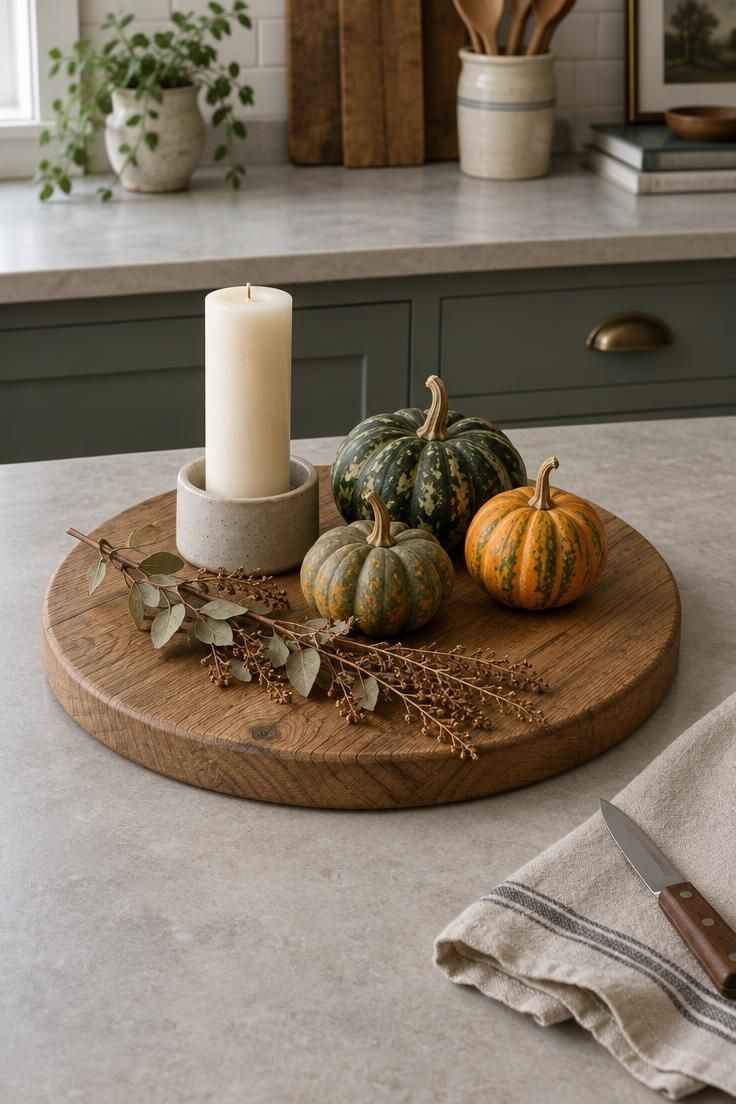
A wooden board gives a small arrangement an edge, which is why it works so well for small pumpkin table accents on a counter end or side table.
The board defines where the vignette begins and ends, so a candle and three gourds read as a composition rather than scattered objects.
Grain is the visual anchor.
A board with visible rings and a slight worn patina does more for the look than a perfectly smooth new surface.
Round shapes suit a curved cluster of gourds, while a rectangular board pairs better with a row of small items.
Keep the candle unlit while cooking and clear of anything flammable, including the dried foliage.
The board arrangement is decoration, not a centerpiece for a working flame, and an unlit candle with a good silhouette carries the same visual weight.
Style Blueprint:
- Select a round wooden bread board with strong grain lines and a worn surface; a board 12 to 14 inches wide keeps three small gourds, a single candle, and one dried stem from looking crowded.
- Keep the candle unlit and place the holder first near the board's edge, then cluster the gourds in front so overlapping silhouettes repeat the board's curved outline rather than lining up in a straight row.
- Lay one dried stem on the empty side of the board when there are only two or three gourds; a crescent-shaped off-center arrangement makes the empty counter around the board feel intentional, not unfinished.
Small Pumpkins Used as Risers Under a Glass Cake Stand
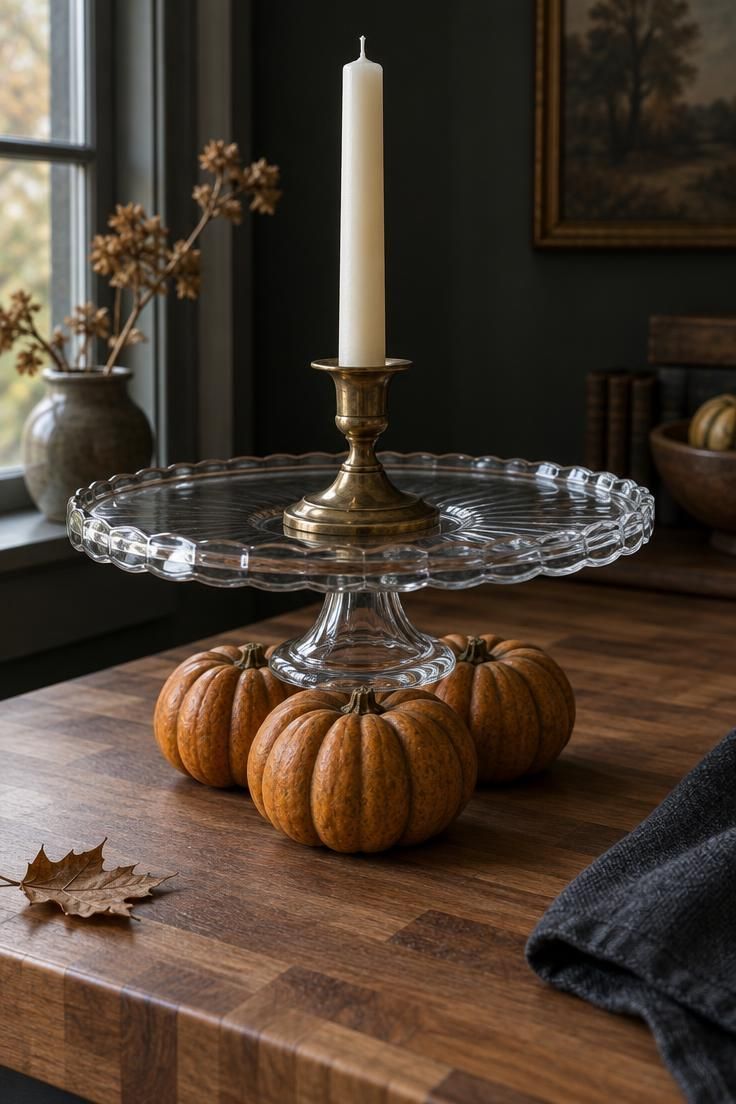
Pumpkins as risers solve a proportion problem.
A glass cake stand lifted on three small pumpkins gains height without a tall footprint, and the sculptural base adds seasonal color right at counter level where it is easy to see.
Similar size matters.
Three pumpkins of roughly matching height keep the stand level and the arrangement deliberate, while mismatched sizes make the glass tilt and look unstable.
Ribbed or knobby textures catch light better than smooth orange skins.
Placement near a stovetop calls for care.
Even at a little distance, a stand near the cooking zone gathers grease and heat, so the counter end away from the range suits the idea better.
A single candle on top keeps the silhouette light and avoids needing much surface.
Style Blueprint:
- Use three pumpkins that are close in height so the glass cake stand sits level and the display reads as a planned plinth rather than a wobbly stack.
- Choose pumpkins with ribbed or knobby surfaces so their ridges and dimples catch low side light and add visible texture beside the smooth glass.
- Place the group on the counter end away from the cooking zone so airborne grease and heat do not settle on the pumpkins, the glass, or the candle.
- Keep the top arranged with a single low candle, leaving enough open glass around it so the stand's clear surface and the pumpkins below remain the main visual weight.
Dried Magnolia and Wheat Wreath on a Pantry Door
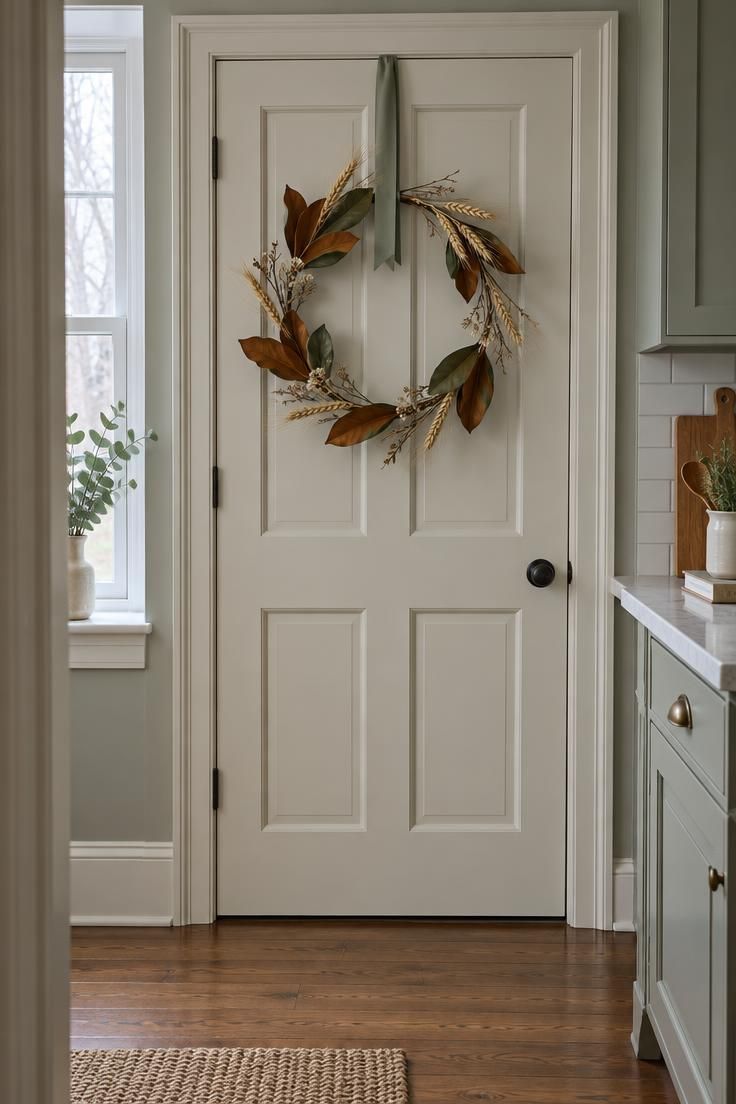
A pantry door offers vertical space that costs nothing in counter area.
A wreath of dried magnolia leaves and wheat adds a focal point at eye level and carries the seasonal palette into a spot that would otherwise stay plain.
Sparse beats dense here.
Visible gaps between stems let the door color show through and keep the wreath from reading as a heavy holiday decoration.
A single muted ribbon finishes it without competing with the leaves.
Position the wreath away from heat and steam.
A door that sits beside the range or opens into a cloud of dishwashing vapor will leave dried material looking tired quickly, while an interior door or a pantry away from the cooking zone keeps it presentable.
Style Blueprint:
- Use a sparse wreath base with visible open spacing so the door color shows through and the wreath does not read as a dense holiday piece.
- Select naturally dried magnolia leaves in muted green and brown tones, plus wheat stems with pale gold color, to keep the doorway tied to the existing kitchen palette.
- Hang the wreath at eye level on the pantry door using a simple muted sage ribbon tied at the top, avoiding extra bows or layered accents.
- Place the wreath on a pantry door away from the range, oven, or dishwasher steam so the dried stems and leaves stay fresh-looking.
- Keep the wreath's shape intentionally uneven, with stems that create gentle gaps and a loose, airy outline rather than a neat symmetrical circle.
Glass Jars of Layered Pantry Staples with Handwritten Labels
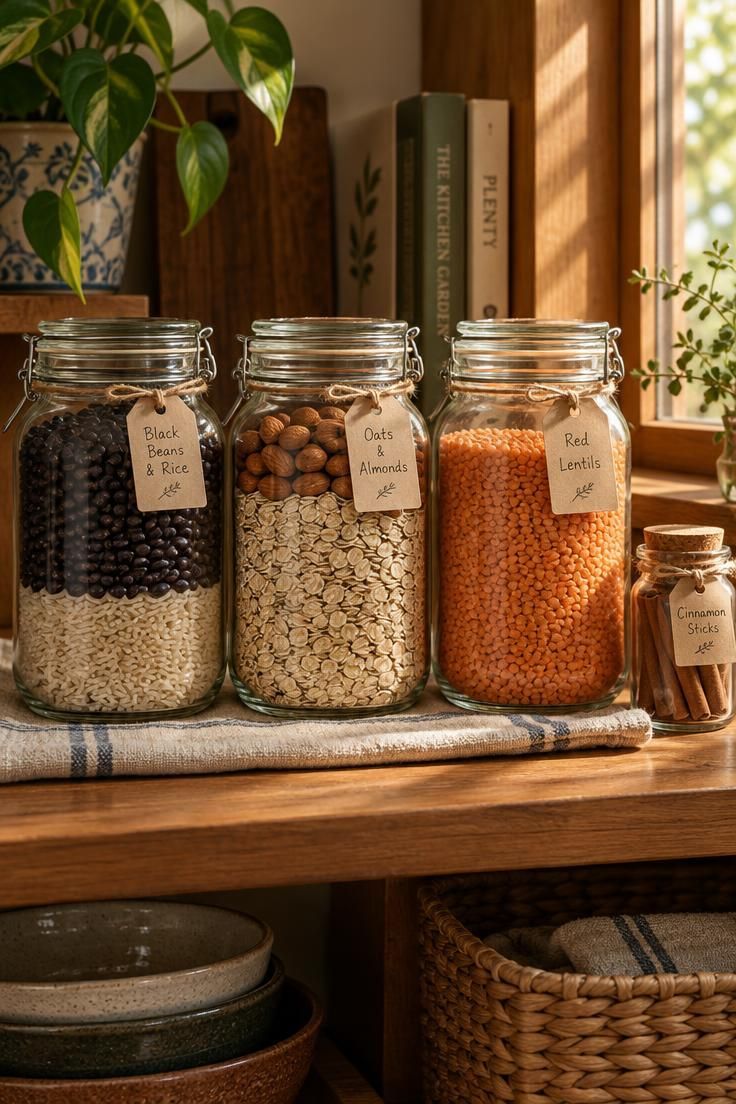
Layered jars turn pantry staples into a small display.
Repetition does the visual work: matching jar shapes and level layers read as a set, while a few handwritten paper tags add a handmade note without much effort.
Layers need contrast to show.
Dark beans over pale rice, or golden oats over almonds, create visible bands, whereas two similar-toned staples blend into one mass.
Fill each jar to the same height so the row scans evenly.
Closed jars keep dust out, and treating the row as a display rather than active storage avoids constant disruption.
If the jars are also used for cooking, refill them from a larger container so the visible layers stay tidy.
The seasonal dish towels display can sit on the shelf below for a soft color echo.
Style Blueprint:
- Match clear glass jars with straight sides before filling so the layered bands read as tidy horizontal stripes rather than slumping curves.
- Use narrow-neck funnels or rolled paper cones when adding each pantry staple to keep ingredient dust off the inside walls and preserve crisp color transitions.
- Write ingredient names on plain paper luggage tags with a dark fineliner, then attach them with natural twine so the labels can be swapped when a jar is repurposed.
Tall Stoneware Pitcher of Dried Grasses in a Quiet Corner
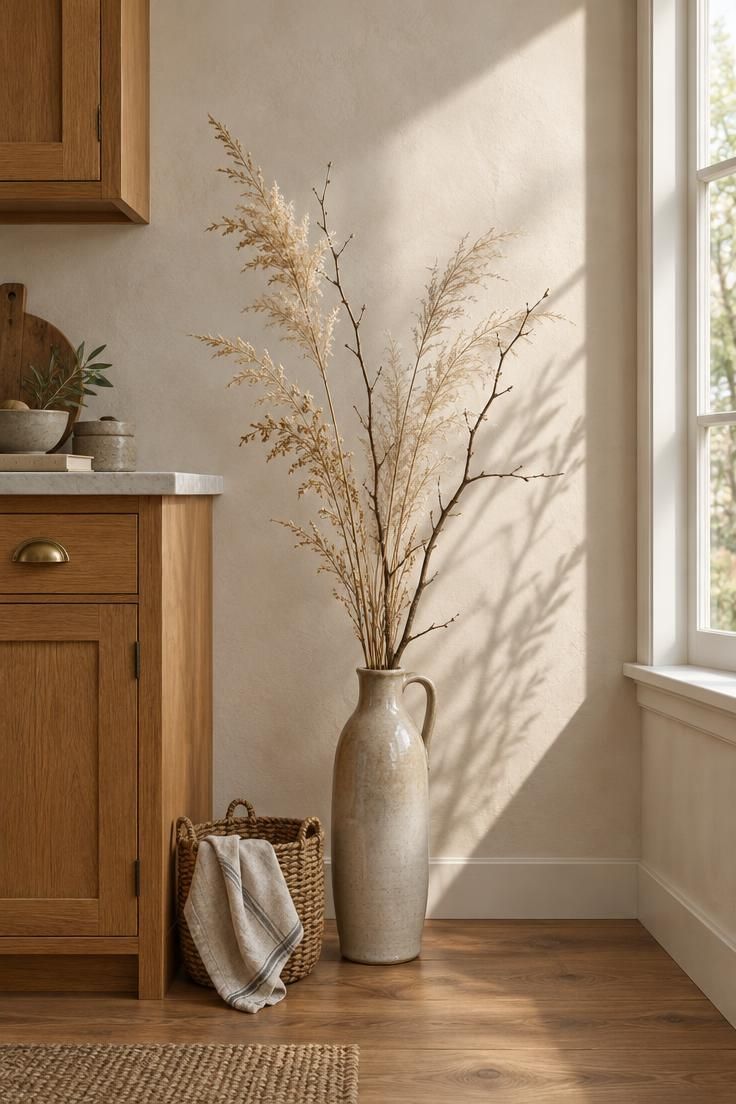
Floor placement changes the scale of a dried arrangement.
A tall stoneware pitcher of grasses or bare branches in a quiet corner breaks up cabinet lines and draws the eye upward, filling vertical space that cabinets leave empty.
Sparse stems keep the idea from looking like a broom.
A handful of grasses and two or three bare branches in a tall vessel read as sculpture, while a full bundle turns bulky.
Matte stoneware grounds the light stems better than a glass vase would.
Check the corner before committing.
The pitcher should not block a walkway or interfere with cabinet doors that swing open, and it should sit where a foot will not find it in a hurry.
Floor placement is best in a corner out of the main traffic path.
Style Blueprint:
- Set a tall matte stoneware pitcher with sparse dried grasses and two or three bare branches directly on the floor in the quietest kitchen corner, keeping the stems loose enough to cast a long shadow across the plaster wall.
- Pair the oatmeal-glazed pitcher with warm oak cabinetry and leave the surrounding floor area mostly open, with only a low woven basket and a folded linen cloth at the base to preserve an airy, unhurried feel.
- Choose stems that stay upright without crowding, allowing the negative space between grasses and branches to read like a sculptural arrangement rather than a dense bundle.
- Place the pitcher out of the main walking path and away from the swing of any cabinet door, using the blank wall as a backdrop so the matte glaze and dried texture stand apart from the wood.
Framed Chalkboard with a Short Seasonal Phrase on a Shelf
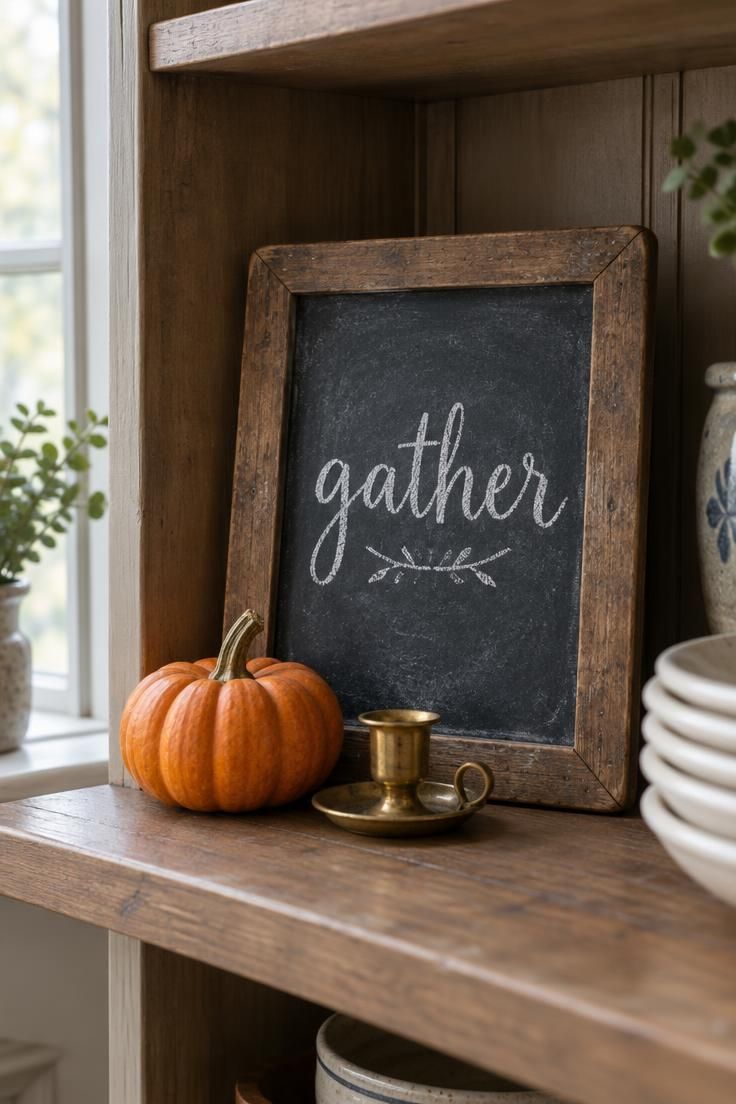
A short phrase on a chalkboard does more than a long quote.
One word, hand-lettered simply, lets the frame and the chalk texture carry the visual interest and keeps the message legible across the kitchen.
Lean the board rather than hanging it.
Resting it against the back of an open shelf or on a counter keeps placement flexible and avoids an empty hook when the mood shifts.
The chalk surface also invites a quick update, from a first name to a short note.
Typography restraint matters.
Ornate script in chalk is difficult to letter well, and layered word art competes with the dishes around it.
A plain hand and one line keep the board looking like a personal note instead of signage.
Style Blueprint:
- Choose a small board with a simple wood frame whose grain and finish relate to an existing cutting board or open-shelf edge in the space.
- Write one short word or brief phrase in plain white chalk with uneven strokes and no more than two lines, letting the board surface texture read clearly.
- Lean the board against the back of an open shelf or against the wall on a counter rather than mounting it, so the arrangement can change without leaving a bare hook.
- Set a small seasonal object or a short candleholder beside the board, keeping it lower than the chalkboard top and leaving visible frame around the lettering.
- Pair the framed board with a stack of plain cream or white dishware nearby, which gives the chalk message a neutral backdrop while the frame edge stays visible.
Layered Throw and Cushions on a Kitchen Window Seat
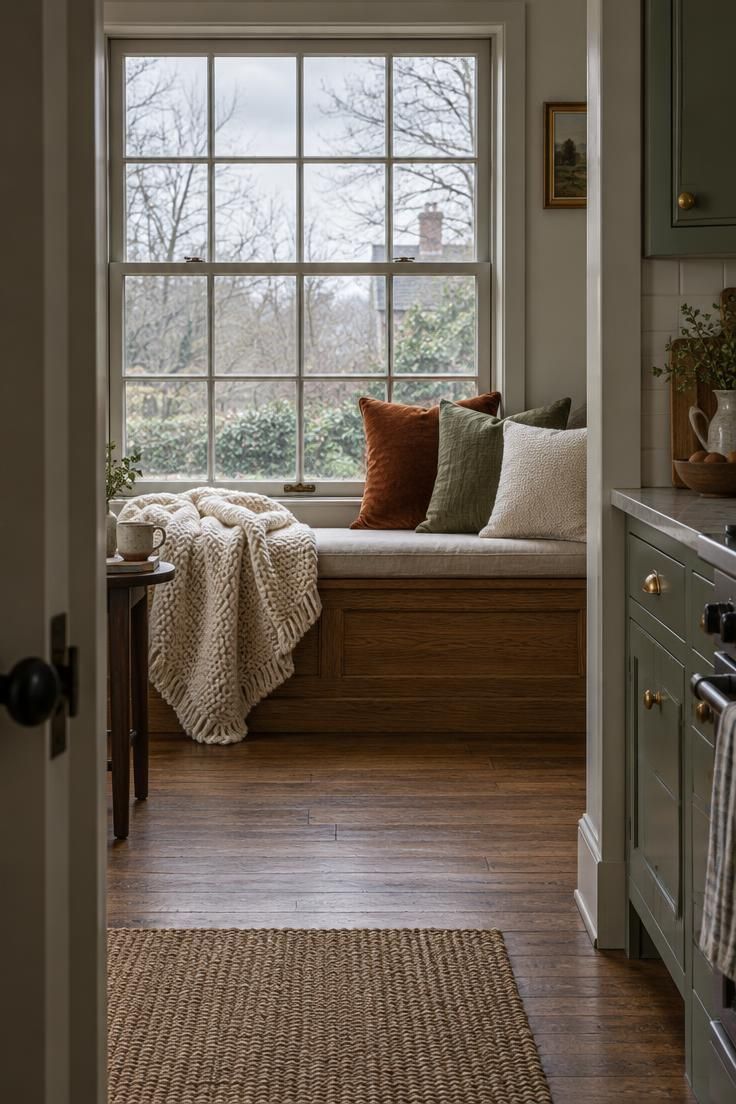
A window seat or bench turns unused kitchen space into a soft landing spot.
A chunky throw over one end and a few cushions on the other add color and texture without claiming any counter area, which suits kitchens that already have a built-in seat.
Keep the seat usable.
Piling cushions across the whole bench looks generous but makes sitting awkward, and a throw draped over both ends tangles.
One end soft, one end clear is the balance that holds up when someone actually sits down.
Palette should echo the rest of the room.
Rust velvet, olive linen, and cream bouclé pick up the same tones as runners and towels, so the seat reads as part of the kitchen rather than a separate room.
Mixing one smooth fabric with one nubby texture adds depth.
A kitchen without a window seat can borrow the idea at smaller scale.
A single cushion on a bench or a folded throw over a stool carries a hint of the same softness without needing dedicated furniture.
Style Blueprint:
- Layer a chunky cream knit throw across one end, letting its edges hang unevenly over the seat front; pair it with three cushions in rust velvet, olive linen, and cream bouclé placed on the opposite end so the center stays clear for sitting.
- Keep one side deliberately bare: fold the throw in half lengthwise before draping it, then stack the olive linen cushion flat with the rust velvet cushion upright against the window side and finish with the cream bouclé cushion in front for tonal separation without blocking the bench.
- Use the seat as a kitchen palette bridge by matching the rust to a nearby runner or towel and the olive to a plant pot or wooden cutting board, then position a small side table with a mug just beyond the cushion edge so the vignette reads as practical rather than staged.
Tray of Candles and Small Gourds on a Sideboard
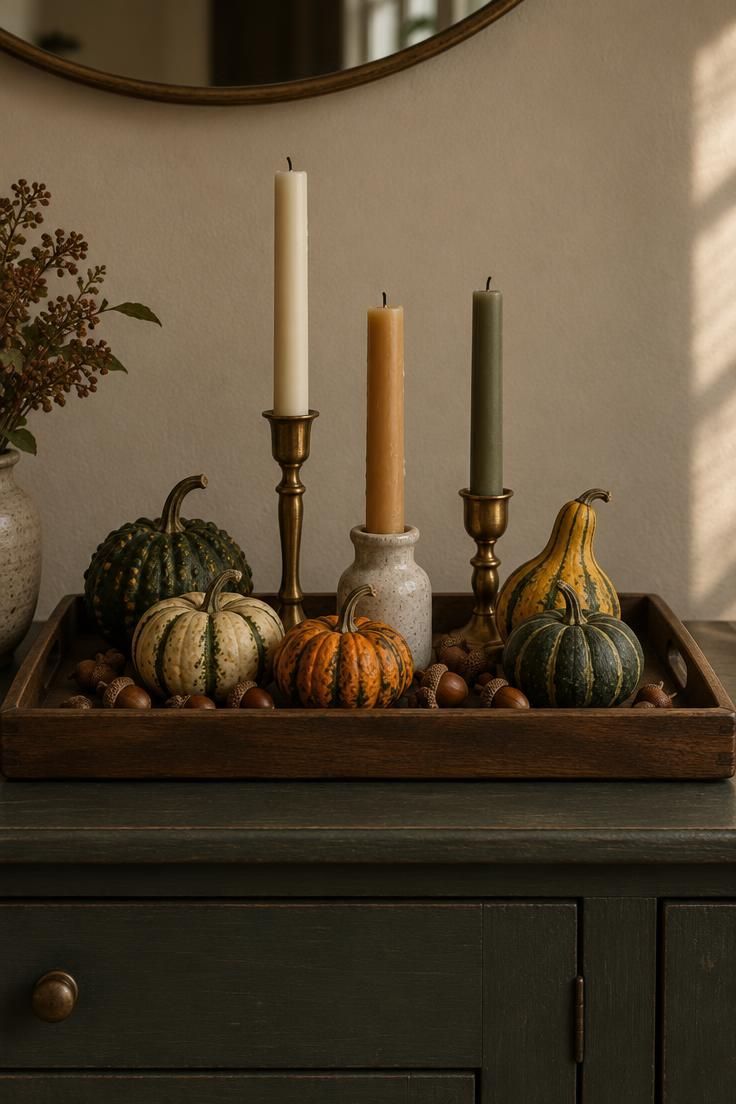
A sideboard or console keeps candle arrangements out of the cooking zone entirely.
Three candles of varied heights on a tray, ringed with small gourds and acorns, create a stepped rhythm that reads well from across the room.
Height variation is the whole design.
Candles at three clearly different levels avoid a row of identical sticks, and a tray low enough to see over keeps the wall behind visible.
Grouping gourds around the bases rather than lining them up softens the composition.
Treat candles as decor during cooking.
Unlit candles on a sideboard away from heat, fabric, and traffic carry the warm look without needing attention, and the arrangement can be lit later when the kitchen has cooled and the meal is done.
Style Blueprint:
- Choose a low wood or stained tray so the candle tops stay below sightlines and the wall behind remains open rather than closing off the console.
- Use three candles with a clear height gap between each: a tall pillar, a medium taper or column, and a short votive or sphere so the rhythm is readable from the doorway.
- Place small gourds and acorns directly around the candle bases, overlapping the tray edge slightly but leaving breathing room between each object so the grouping feels full without becoming cluttered.
- Keep the finish mix limited to unglazed ceramic, aged brass, and matte wax so the surfaces absorb low window light and the moody sideboard setting comes through without sparkly accents.
Conclusion
The strongest Thanksgiving kitchen arrangements share two habits: everything is contained on a bowl, tray, board, or shelf, and everything can move when the cooking demands it.
Decor that crowds a prep zone stops working by the time the turkey goes in, no matter how good it looked that morning.
Edit back before the holiday rather than adding more.
One clear grouping per surface usually carries a room further than several small arrangements competing for attention.
After the meal, wood bowls, ceramic pitchers, and neutral linens shift easily into winter styling with a swap of greenery or a change of fabric, which makes the effort last well past the holiday.