This post may contain affiliate links. If you make a purchase through these links, we may earn a commission at no additional cost to you.
Retro Christmas decorating reads best when it gathers a few period-specific cues rather than scattering many small objects.
The strongest small-space looks come from saturated ornament colors, glossy ceramic and glass finishes, and light that catches reflective surfaces.
A palette limited to one era's story, whether pink and aqua, red and turquoise, or metallic with jewel tones, keeps a corner looking intentional instead of mixed.
Each idea here is a self-contained vignette that can stand on a shelf, tabletop, or mantel without requiring a whole-room overhaul.
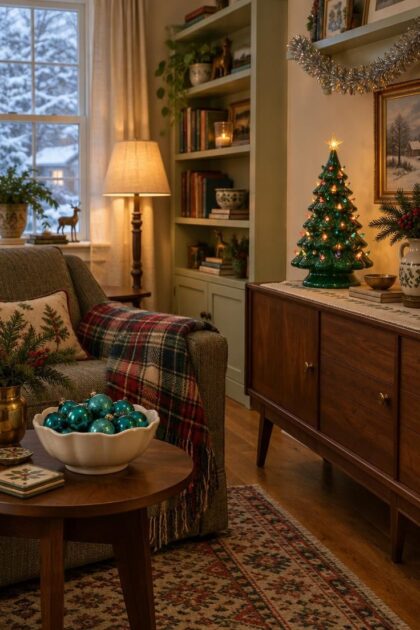
Shiny-Brite Ornament Cluster in a Low Bowl
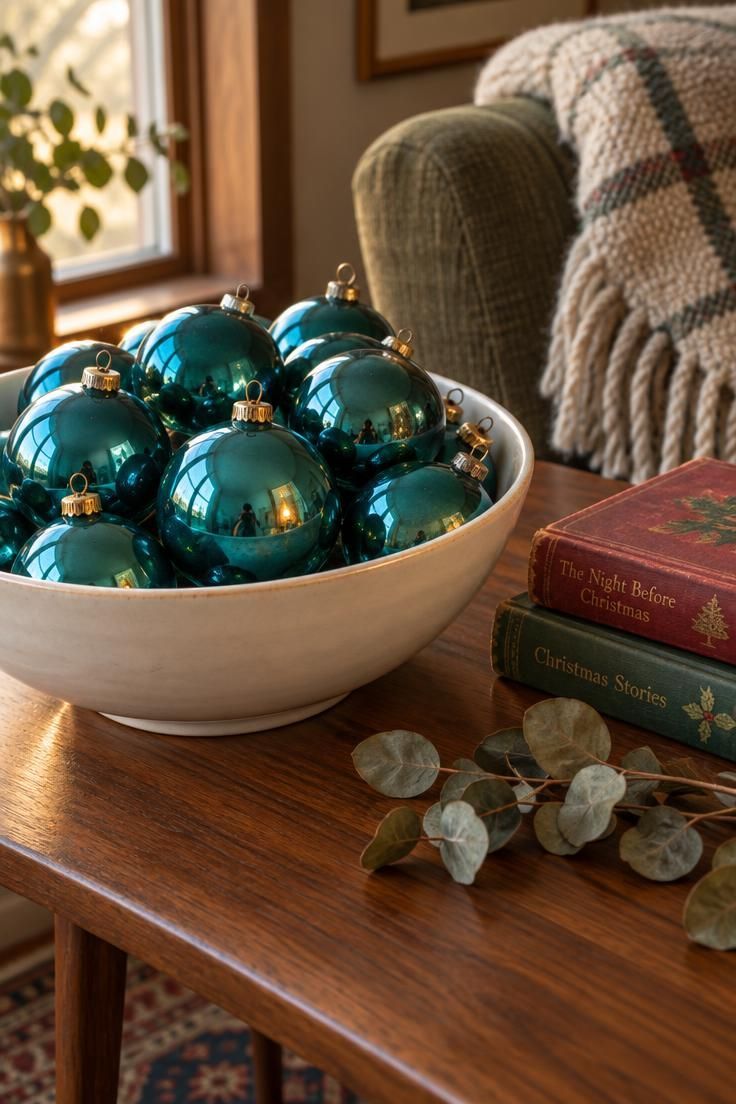
A single hue turns a bowl of ornaments into a deliberate period display.
Glossy shiny-brite ornaments in one saturated color read as a collected set rather than a random assortment, and the bowl keeps the shapes grouped into one clear focal point.
Choose a vessel with a simple rim so the ornaments stay the brightest element.
A plain white ceramic or silver bowl lets the glass color carry the composition, while a patterned bowl splits attention between the vessel and its contents.
Dense clustering hides detail.
Individual stencils and finial shapes disappear when ornaments are packed tightly, so reserve this look for a spot viewed from a few feet away rather than a surface inspected up close.
Scale matters more than count.
A bowl that is slightly wider than the stack of books beside it keeps the arrangement grounded, and leaving a little bare table around the bowl prevents the corner from feeling crowded.
Rotating the bowl a quarter turn every week or so keeps the same side from collecting dust and lets different ornaments catch the light.
Style Blueprint:
- Shallow white ceramic or silver bowl with a clean rim
- Glass ornaments in one saturated hue, such as teal, pink, or orange
- Walnut or dark wood side table for contrast
- Two vintage Christmas books stacked flat beside the bowl
Design Pro-Tip: Turn the bowl a quarter turn each week so dust does not settle on one side and different ornaments catch the light.
Pastel Pink and Aqua Mantel Vignette
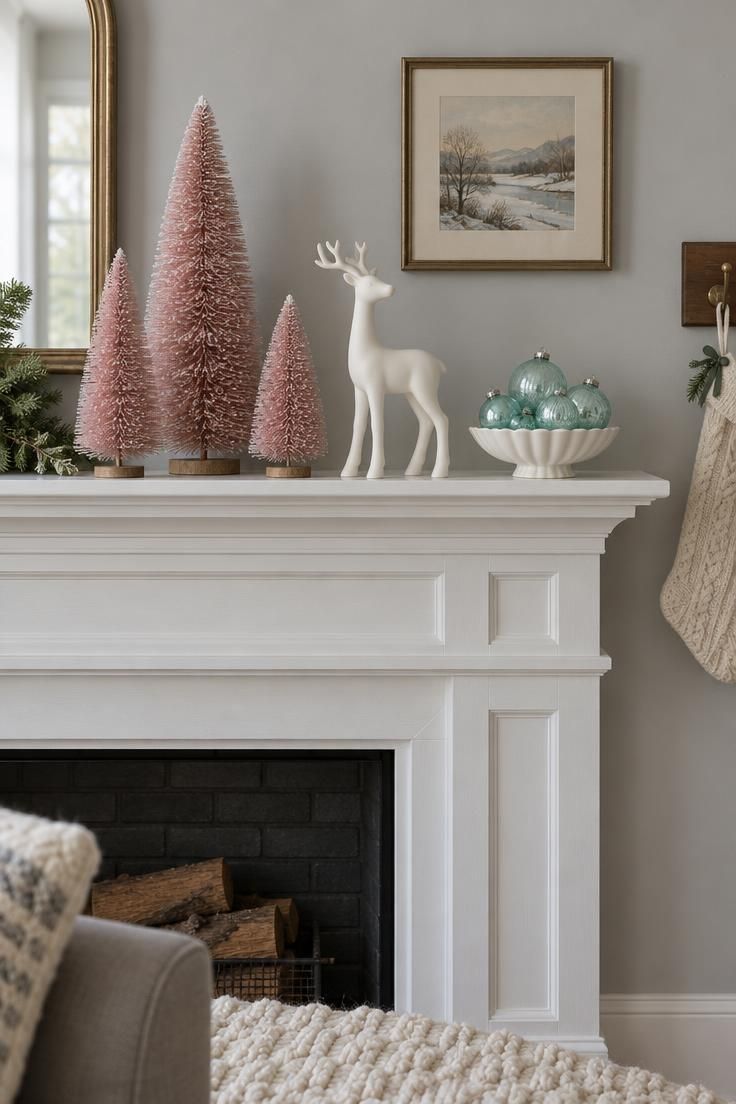
Soft pastels need a quiet backdrop to hold their own.
Against a dark or strongly patterned wall the pale pinks and aquas wash out, while a neutral gray or white surface lets each tone stay legible.
A pastel Christmas palette works when the color story stays tight.
Three tones, pink, aqua, and white, keep the arrangement from sliding into a general pastel assortment, and repeating each tone at least twice ties the objects together.
Place the largest bottle-brush tree off-center as an anchor.
Centering the tallest piece divides a mantel into two equal halves, while an off-center anchor lets the eye travel across the shelf and back.
Texture keeps pastels from feeling too sweet.
If every object is glossy, add one matte clay or chalky white piece, such as a simple figurine or a small dish, so the finish contrast gives the display depth.
Vary the heights deliberately.
Three bottle-brush trees at clearly different sizes read as a family, while two similar trees side by side look like an accident.
Leave breathing room between groupings.
A gap of bare mantel between the trees and the dish makes each cluster look considered rather than crammed.
Style Blueprint:
- Pink bottle-brush trees in three distinct heights
- Aqua glass ball ornaments in a small white dish
- One matte white ceramic figurine for texture contrast
- Pale gray or white wall behind the mantel
- Simple stocking hook board at the edge
Ceramic Christmas Tree as a Tabletop Focal Point
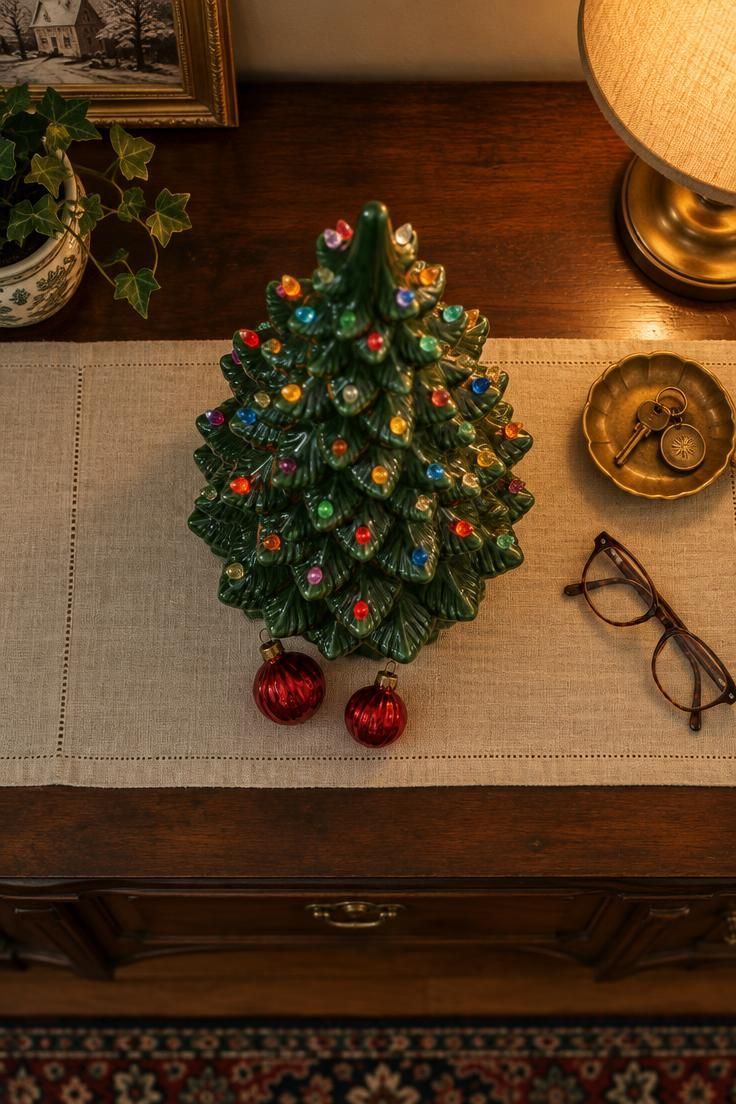
A lit ceramic Christmas tree earns its place as a small-space substitute for a full tree.
The conical silhouette and painted bulb details carry the holiday shape in a fraction of the footprint, which suits an entry console or sideboard.
Keep the styling under the tree simple.
A lace doily or solid linen runner gives the ceramic texture a clean stage, while busy linens compete with the small painted details that make the piece recognizable.
Dust settles in the tiny painted bulb holes.
A soft brush or a gentle pass with a vacuum brush attachment on low suction keeps the surface clear, and this piece benefits from that care before and after the season.
Scale the tree to its surface.
On a low console, stacking one or two books beneath the tree raises it toward eye level without adding clutter, a visual adjustment rather than a structural one.
Pair the green glaze with one warm accent.
Red glass ornaments at the base echo the painted bulbs and give the composition a bottom edge, while a second color would compete with the multicolor finish.
Style Blueprint:
- Green glazed ceramic Christmas tree with painted bulbs
- Cream linen runner or lace doily beneath it
- Two red glass ornaments at the base
- One or two hardback books for a subtle lift
- Brass key dish or reading glasses as everyday props
Aluminum-Style Tree with Jewel-Tone Ornaments
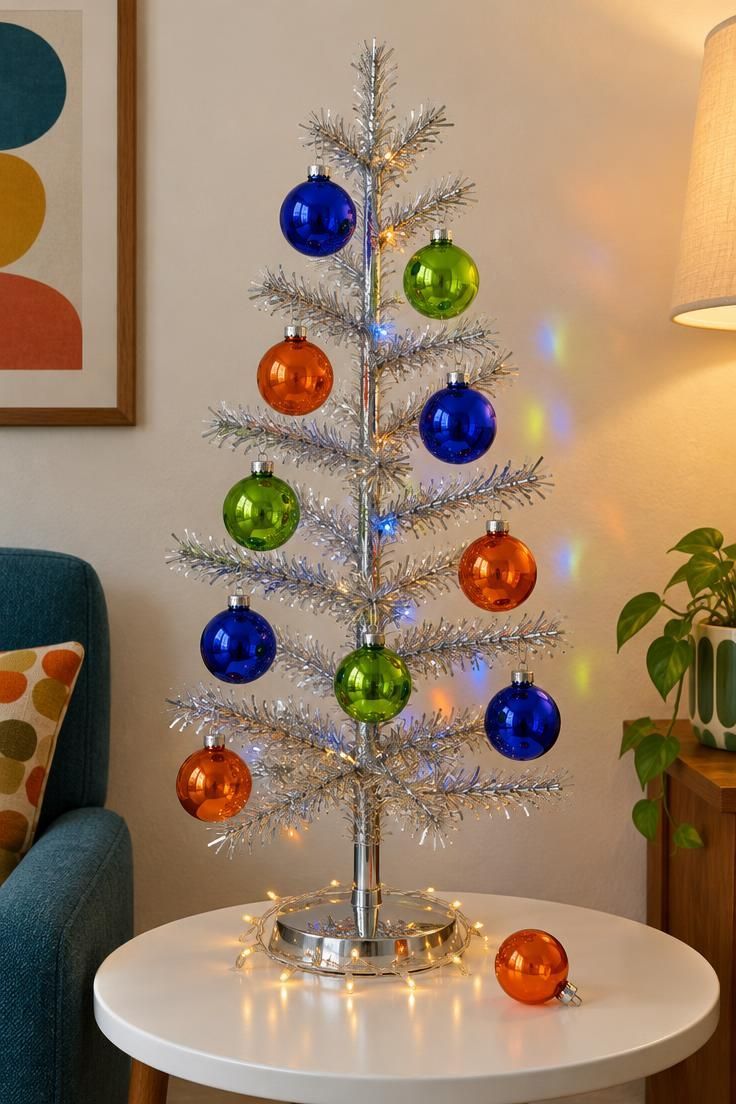
Metallic branches pick up colored light, so the aluminum-style tree shifts in tone as nearby lamps and bulbs glow.
Placing a warm light source near the tree, such as a small lamp or a short string of lights, feeds that reflection and makes the silver read as dimensional.
A saturated pastel Christmas palette is not the only option here.
Jewel tones, including cobalt, lime, and orange, push the metallic finish toward its period look, while pale ornaments would soften the sparkle into something more contemporary.
Keep the background plain.
Patterned wallpaper competes with the reflective branches and splits the viewer's attention, while a cream or white wall lets the tree's silhouette do the work.
Ornament count matters on a small tree.
A dozen baubles leave stretches of silver visible between them, and that visible metal texture is what distinguishes this look from a standard green tree.
Space the ornaments slightly unevenly and in pairs of color.
Clustering two cobalt baubles near each other, then a lime one, gives the tree rhythm without a strict pattern.
Style Blueprint:
- Small aluminum-style tabletop tree
- Jewel-tone glass ornaments in cobalt, lime, and orange
- Plain cream or white wall behind
- Warm table lamp or short string lights nearby
- Round white side table
Design Pro-Tip: Leave visible stretches of silver between ornaments so the metallic texture stays part of the composition rather than disappearing under baubles.
Tinsel Garland as a Graphic Wall Line
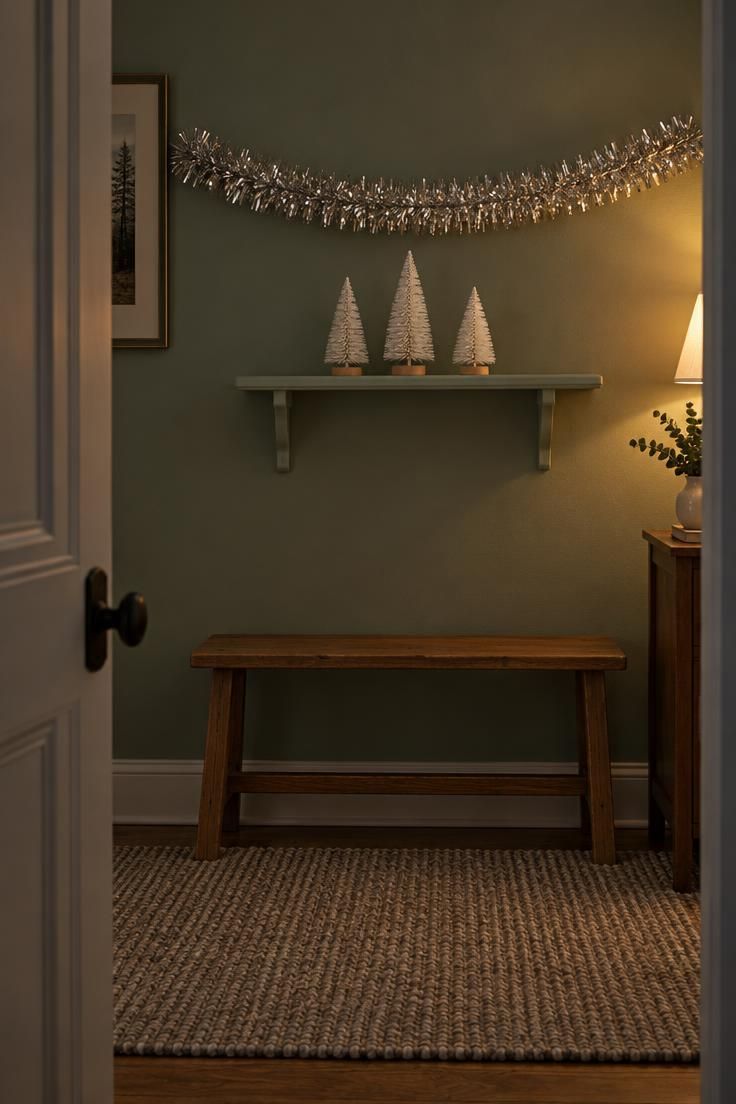
Tinsel garland works as a graphic element when it holds a crisp line.
A straight horizontal swag reads as a deliberate stroke across a wall, while loose loops and sagging curves turn the same material into general decoration.
Position the line just above eye level.
From that height the metallic strands catch light from several angles across the room, and the reflections shift as a person moves through the space.
A single swag can fill an empty wall without a tree or large anchor piece.
This suits apartments and small rooms where a full tree would crowd the floor, since the decoration lives entirely on the vertical plane.
Tinsel sheds, and the loose strands are easiest to manage when the garland stays away from doorways and busy walkways.
A wall or shelf edge that people pass rather than brush against keeps the display tidy.
Match the swag length to the shelf or frame below it.
A garland that runs slightly wider than the furniture it spans looks intentional, while a short strand floating alone appears unfinished.
Style Blueprint:
- Silver tinsel garland in a straight horizontal swag
- Pale green or muted wall for contrast
- Three small white bottle-brush trees on a shelf below
- Simple wooden bench or low furniture beneath the line
Felt and Knit Stocking Row on a Low Rail
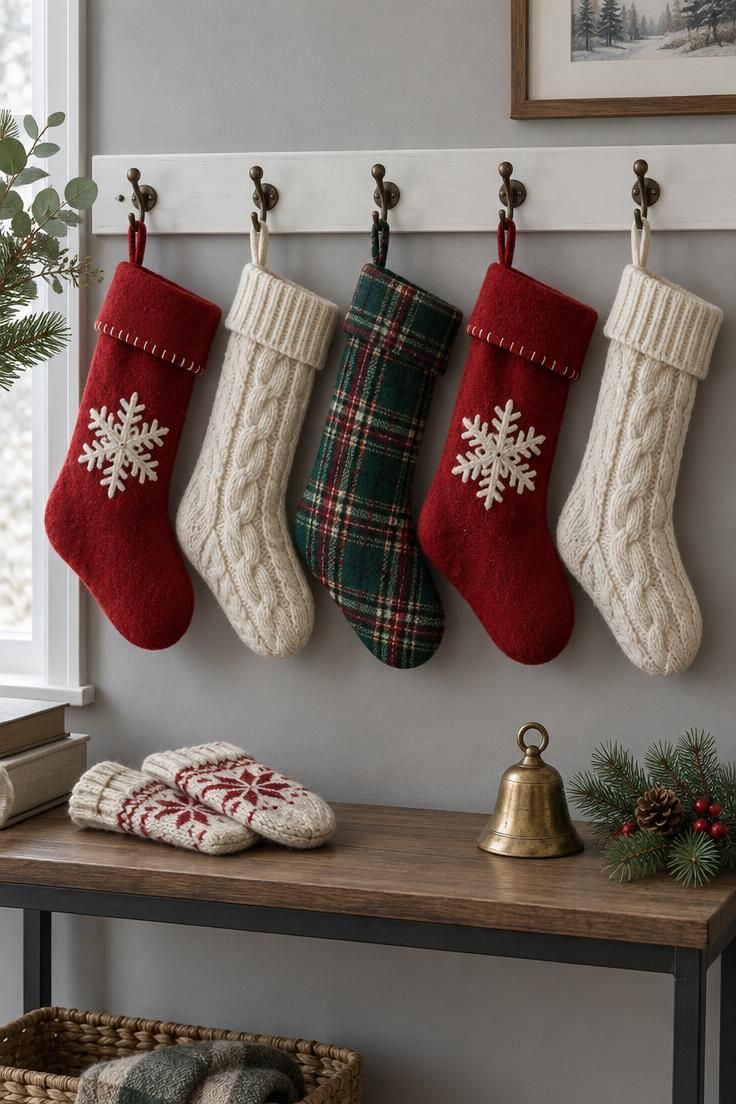
A row of textured stockings turns a hallway or entry into a holiday vignette.
The repeated stocking shape carries the display, so the rail needs no other decoration around it.
Similar width and a shared hanging height create the rhythm.
Five stockings of roughly equal size, each hung from the same line, read as a set, while mixed sizes at staggered heights look like leftover storage.
Alternate two textures or patterns for variety.
Felt with appliqué next to plaid next to cable knit gives the eye something to move across, and the alternation prevents any single stocking from dominating the row.
Heavy knit stockings stretch when hung by the cuff over time.
A waistband or loop style holds its shape better if the stocking has any weight to it, a practical note for choosing which pieces go on the rail.
This vignette suits renters because it needs only a removable rail.
The rail can come down after the season and the wall returns to its usual state.
Keep the console below sparse.
A pair of mittens or a small bell is enough, since the stocking row already supplies the color and texture.
Style Blueprint:
- Low white wooden rail or hook board
- Two red felt stockings with white appliqué
- One green plaid stocking
- Two cream cable knit stockings
- Soft gray wall behind the rail
Vintage-Style Santa and Reindeer Figurine Grouping
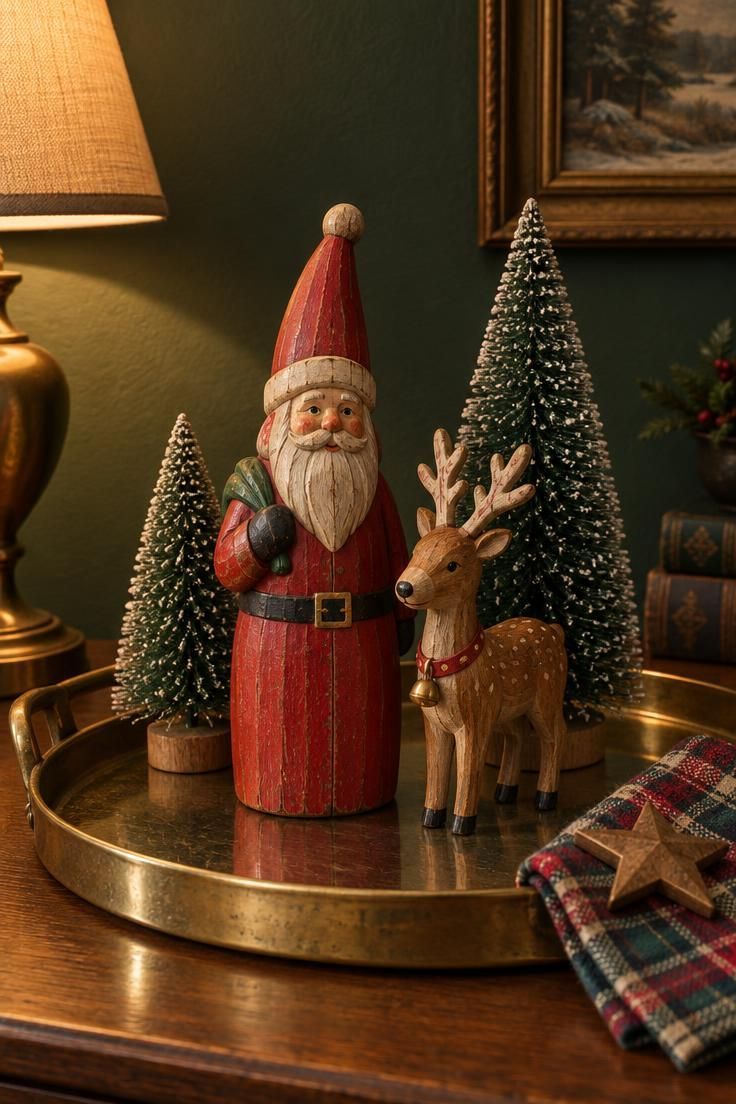
A tray turns a scatter of figurines into one collected display.
Keeping the Santa, reindeer, and small trees within a single boundary makes the group read as a curated set rather than objects spread across a room.
Mix materials for contrast.
Painted wood and glazed ceramic side by side give the grouping a range of finishes, and the brass tray beneath adds a warm metallic base that ties the mixed surfaces together.
Point each figure toward the center of the tray.
Figurines facing different directions look cluttered and scattered, while a shared inward focus makes the group feel like a small gathering.
Placement on a side table lets the display be seen from the front, which suits figurines with painted faces and details meant for eye-level viewing.
Keep the group small.
Two figures and two small trees fill a tray without crowding it, and an empty margin of brass around the edge frames the composition.
Style Blueprint:
- Round brass tray as the boundary for the grouping
- One vintage Santa figurine in painted wood
- One reindeer figurine with painted antlers
- Two painted bottle-brush trees
- Dark green or deep neutral wall behind
Retro Tree with Large Colored Bulbs and Dense Fill
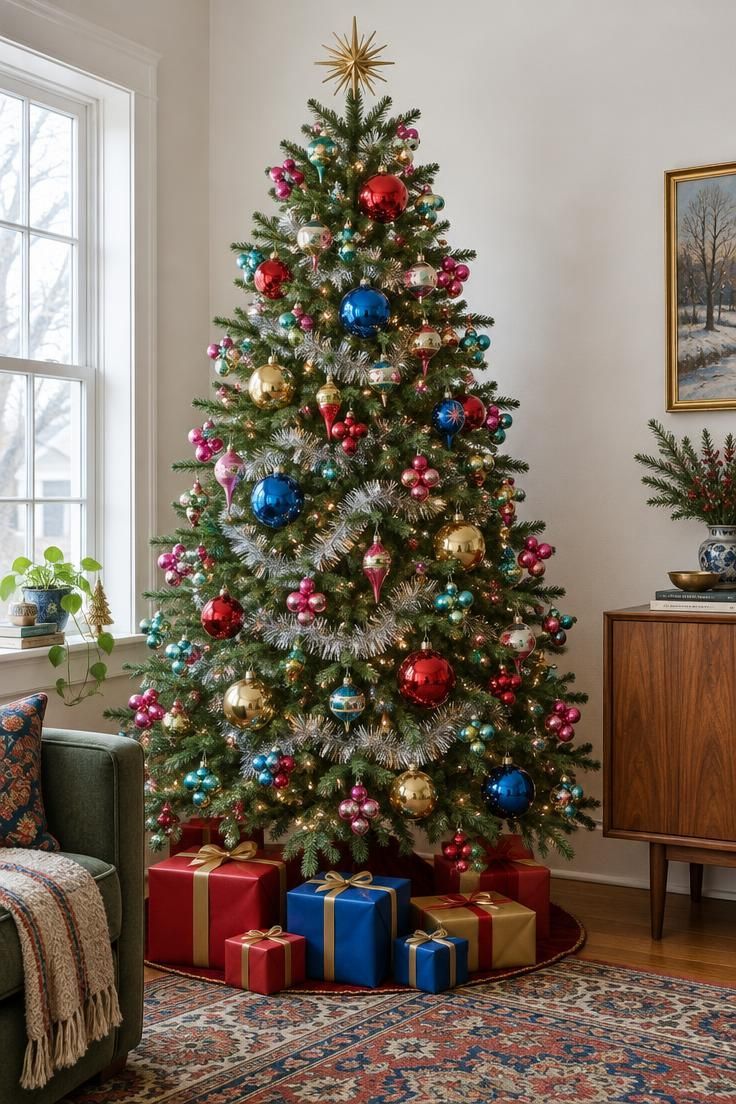
The dense, filled silhouette is the goal of a retro tree treatment.
Ornaments sit near the branch tips while tinsel fills the inner gaps, so the tree reads as one solid shape of color rather than a sparse frame with hanging pieces.
Cluster ornaments rather than spacing them evenly.
Groups of two or three shiny-brite style baubles in pink and teal create small focal points across the tree, and the gaps between clusters leave room for the larger bulbs to stand out.
Large colored bulbs supply the period glow.
Red, blue, and gold bulbs at a generous size read as mid-century, while tiny white lights would push the tree toward a more contemporary look.
This approach needs more ornaments than a modern sparse tree.
Filling out the branches takes volume, so a smaller tabletop tree may be easier to complete with fewer pieces while still achieving the look.
Wire the tinsel into loose twists before draping.
Twisted strands stay visible between branches, while flat strands disappear into the greenery.
Keep the surrounding room simple.
A plain wall and a low credenza let the tree carry the visual weight, and solid-colored wrapping paper at the base adds to the composition without competing.
Style Blueprint:
- Full green tree with a dense silhouette
- Large colored bulbs in red, blue, and gold
- Silver tinsel in loose twists through the inner branches
- Clusters of pink and teal shiny-brite style ornaments
- Solid-colored wrapping paper at the base
Plaid-and-Red Tabletop Vignette
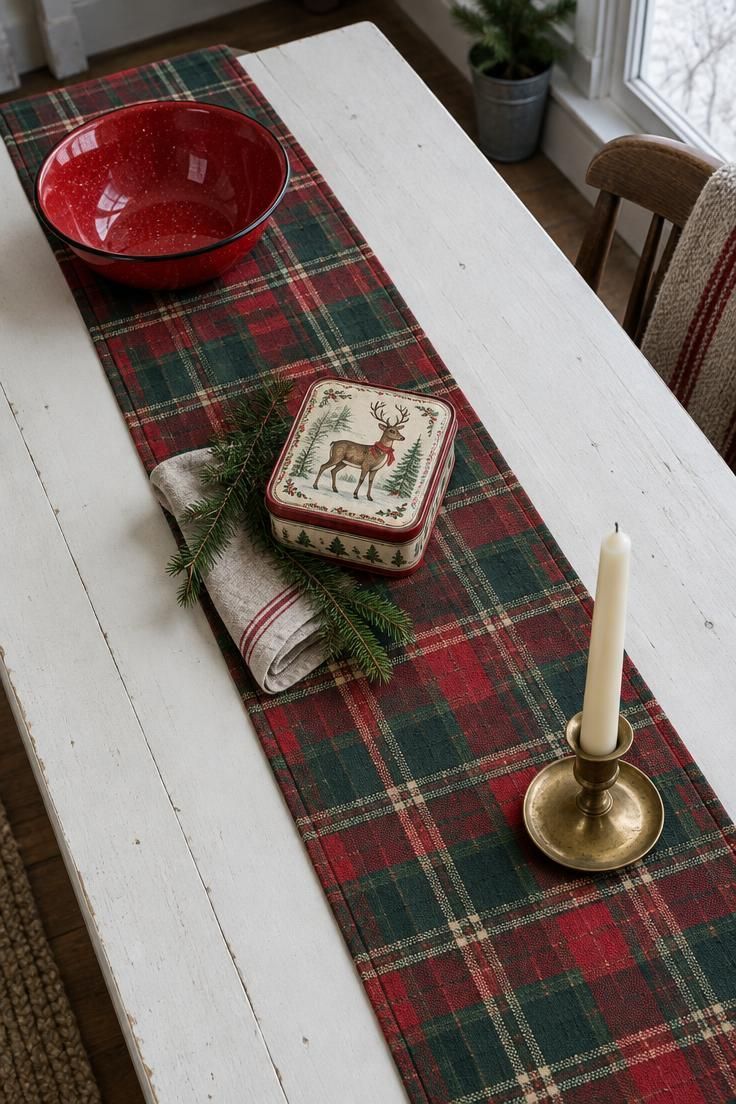
The plaid becomes the dominant pattern in this tabletop vignette, so every other object stays solid-colored or simple.
A red enamelware bowl, a printed tin, and a plain candle let the runner's lines carry the visual interest.
Place the enamelware at one end of the runner.
Anchoring the heaviest object at the end leaves the middle of the cloth visible, and the plaid lines can run unbroken down the table.
Red enamelware scratches when stacked or stored roughly.
This vignette works better as a display than as daily serving ware, and the bowl stays in place rather than moving to the kitchen and back.
A narrow console suits this look because the runner defines a contained band of color.
On a wider table the plaid spreads thin, while a narrow surface keeps the pattern compact and graphic.
Add one soft texture to offset the hard finishes.
A linen napkin or a few pine sprigs beside the tin gives the composition something matte to balance the gloss of the enamel and brass.
Style Blueprint:
- Red and green plaid runner
- Red enamelware bowl or dish at one end
- Small Christmas tin with a simple print
- Cream candle in a brass holder
- Linen napkin or loose pine sprigs
Design Pro-Tip: Anchor the heaviest solid-colored object at one end of the runner so the plaid lines stay visible through the middle of the table.
Window-Sill Row of Lit Objects and Snow Globe
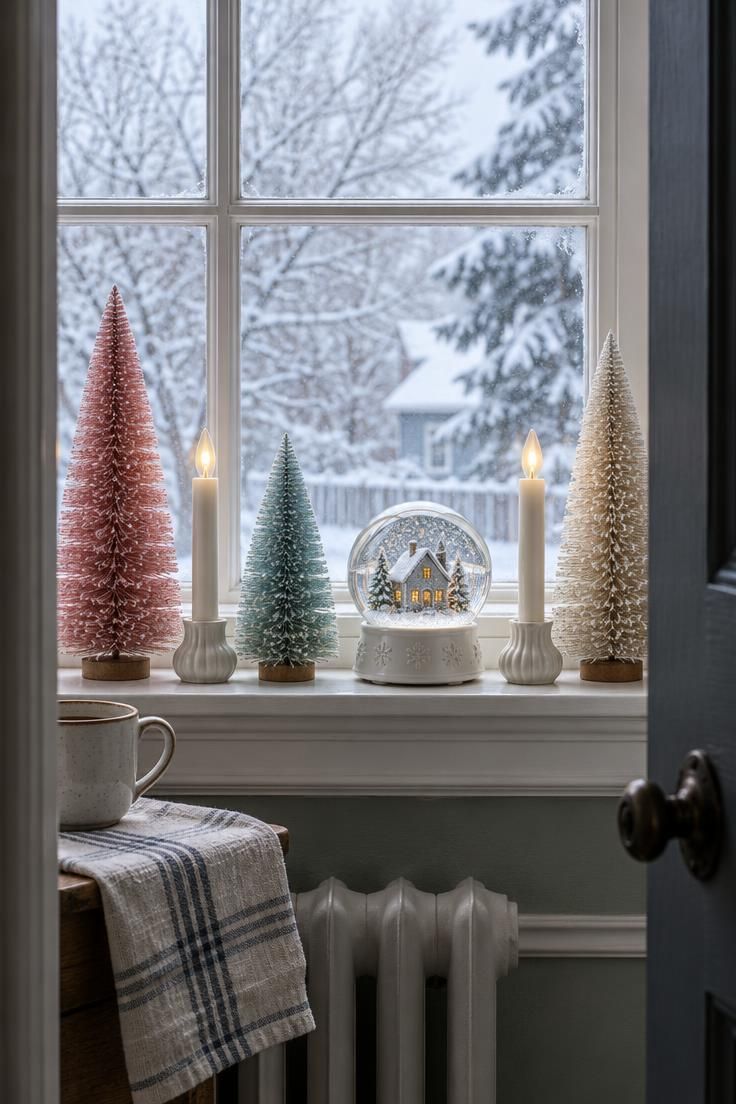
The sill's straight edge holds the row together.
A tight line of small lit objects along a windowsill reads as a composed display, and the window frame supplies a natural boundary on both ends.
Alternate heights so the row moves like a skyline.
Pink and aqua bottle-brush trees at different sizes, mixed with candle-style lights and a snow globe, give the eye small steps to follow across the sill.
Keep the tallest pieces at the ends.
Snow globes and glass bottle-brush trees can look top-heavy in the middle of a row, while end placement frames the composition and keeps the center low and open.
A kitchen or bathroom window suits this vignette because natural light behind the objects makes the glass glow.
The bottle-brush trees pick up that backlight through their bristles, and the snow globe's interior brightens.
Limit the row to a handful of objects.
Five pieces fill a standard sill without crowding, and any more turns the line into clutter.
Style Blueprint:
- White windowsill with a clean straight edge
- Two small bottle-brush trees in pink and aqua
- Two warm candle-style lights
- One snow globe with a simple house inside
- Tallest pieces placed at the ends
Conclusion
Retro Christmas styling works best when each vignette commits to one clear period cue, whether that is a saturated ornament color, a soft pastel pairing, a glossy ceramic form, or a graphic metallic line.
Keeping the number of objects low and the colors disciplined lets small tables, sills, and shelves carry the look without a full-size tree.
Pick one idea that matches the room's existing finishes, then build outward from that single anchor piece.